 planning and carving
Much more fun it was some years ago using an Agfa Clack. I was boarding with a gentleman in Medan, Indonesia who introduced me to the darkroom and processed the first pictures made with that Agfa (still using red light during processing). After that a procession of Zeiss Ikon nettar, Ikoflex, Werra, M3 with the most beautiful lens I ever had (a Summicron 135 mm), Nikkormat and now the D70.
 eel nets
It was magic then. It took planning. The visualisation of what you wanted to achieve. Pick the right moment in the 24 hrs, the right light the right everything. Pick the right sort of film, developer, paper and all the tricks in your memory etc, etc, (now using amber light during the process). Then the magic moment was there, just as you wanted it or still a surprise anyway.
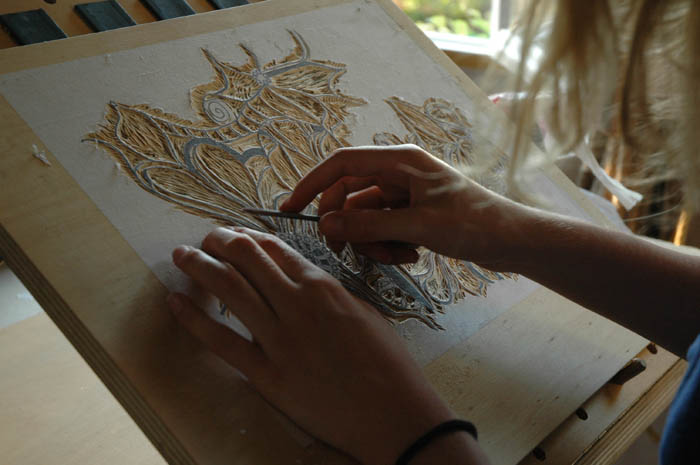 carving the block
 block with wash between the lines
 sumi applied with a brayer
Anyway, it is all taking shape veeery slooowly ( see link), but we are getting there. Three presses, several working tops. Presently a wet bench with a large size sink under construction. Also setting up for etching with copper sulphate on zinc with or without electrolysis. Paper drawers. Letter type sets (for extra interest) etc, etc.
If you are already a printer and artist, you find yourself in these regions and want to play with all this, but haven’t got the facilities you are perfectly welcome too. There is no pretence. We are all equal and are all learning all of our lives and then we can forget.
To warm the place up, I’ve had the help (and still have) of some friendly students to get the atelier and its concept together. On this page are some photos of them at work. One of the students had to meet a deadline with at least one stage of her print of which the result is shown. This block is by no means ready and there will be three more blocks before the final print is made.
 Alice's print printed on Kochishi in two stages, first stage the wash was printed using the thumbs to push the moist paper down between the relief