After having seen Carcassonne and a few of the Cathar castles, cycled up some serious hilly roads and enjoyed the surroundings, they decided to have a go at woodblock printing.
Apart from remembering what they did at college during art class, like creating a linocut, no other attempt was made at printing.
 subject
 trial block
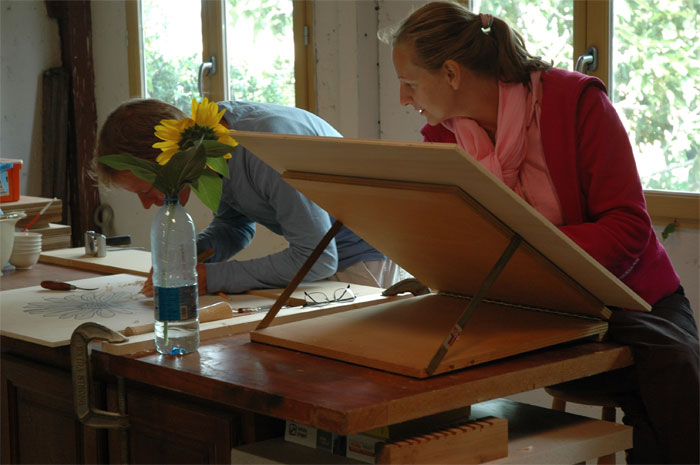 cutting away
After that it was all downhill. I'd imagined that after a few hours they would have liked a break and do some more sightseeing, but no, they were hooked (line and sinker included for sure).
Not much explaining was required after that apart from the odd tip and a bit of guidance. They really took to it like ducks to water. It was a joy to watch. Anyway at the end of day one and printing very late in the evening, as it was rather hot in the afternoon, we had the first proofs.
For the yellow, deep cadmium yellow dry pigment with rice paste was used, Moku Hanga fashion. That was just and only just possible as the humidity was very low indeed. For the black we had to resort to oil based etching ink as it was an absolute no show using Sumi or the like. The paper was 200 gms cartridge. Because of the nature of the print and the weight of the paper I'd imagined to get away with not moistening the paper and I did: it did not cockle or warp.

applying pigment with brush
They had a go, using the brush for applying the pigment, using the brayer, placing the paper correctly, making use of the registration slots (kento's), printing with the Baren, in short the works and in the end, there it was, the smile.
 smiles end of day one
The advice was, what you don't cut now, you can always cut away later. Not the other way round. Thus it was decided by the the two xylographers to cut away more in the petals, keeping in mind the natural shading and overlapping of the petals. This adds some depth to the image.
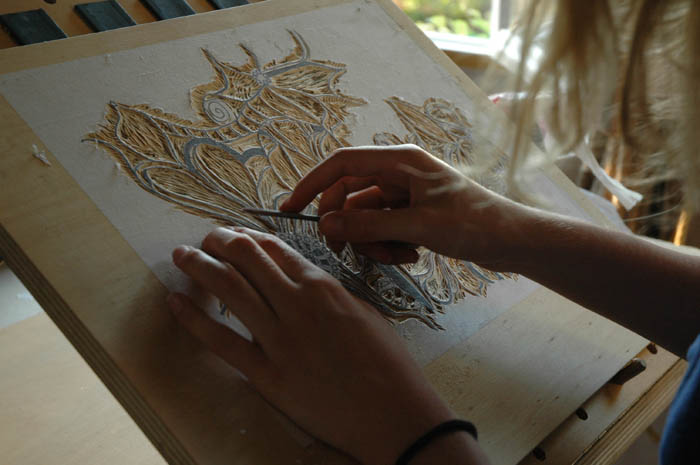
 first cut
 working out detail
 second cut
During printing the paper picked up some pigment outside the actual image. However I believe it only enhances the playfulness and vibrance of the sunflower head and suggests movement.
 yellow block
 final print